Sunday, March 28, 2010

Chocolate Peanut Butter Cake


Last Monday I received an email that started off with the line "You MUST make this cake!!," and she went on to tell me about the most delicious peanut butter chocolate cake she made for her husband's birthday. She got the recipe off of Smitten Kitchen, and they got the cake recipe from the book Sky High: Irresistible Triple-Layer Cakes which is now officially on my birthday present wish list. The cake on the Smitten Kitchen Blog looks semi-professional, so try not to judge mine too harshly.

She was not lying about this cake. It is UNBELIEVABLE!! Next to Mr. Darcy and Elizabeth, I believe peanut butter and chocolate might be the greatest pairing of all time (apologies for the nerdy literary reference).

I liked this recipe because the steps were easy to divide up, and ultimately, it only required 3 bowls to make. I'm not particularly good at icing cakes, so the chocolate ganache did a nice job of covering up my cake's imperfections and creating an overall "rustic" look. The recipe is meant for 3 8-inch pans, but I used 3 9-inch pans. The cake probably wasn't as tall as the original, but that's all.

Both my friend and the blogger at smitten kitchen complained about the cake being difficult to ice because it was so moist and crumbly. My cakes cooled in the fridge all day, so I didn't have that problem. They both suggested creating a crumb layer. I've never actually done that, so here is a how-to link about icing cakes http://www.chow.com/stories/10046 that I found helpful.


Here is what you will need:


Step 1: Preheat the oven to 350 degrees F. Butter the bottoms and sides of three 8-inch round cake pans. Line the bottom of each pan with a round of parchment or waxed paper and butter the paper.Sift the flour, sugar, cocoa powder, baking soda, and salt into a large bowl. Whisk to combine them well.


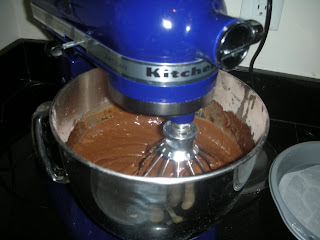
Step 2: Add the oil and sour cream and whisk to blend. Gradually beat in the water. Blend in the vinegar and vanilla. Whisk in the eggs and beat until well blended.


Step 3: Scrape down the sides of the bowl and be sure the batter is well mixed.


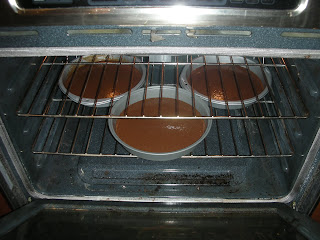
Step 4: Divide among the 3 prepared cake pans.Bake for 30 to 35 minutes, or until a cake tester or wooden toothpick inserted in the center comes out almost clean. Let cool in the pans for about 20 minutes. Invert onto wire racks, carefully peel off the paper liners, and let cool completely. ( Note: I made these in the morning and kept them in the refrigerator all day, so they would be firm by the time I wanted to ice them. I had been warned that they would be very "crumbly" otherwise. The blog I took this from suggested putting them in the freezer for 30 minutes before icing them.)


Full List of Ingredients for the Cake Layers:
2 cups all-purpose flour
2 1/2 cups sugar
3/4 cup unsweetened cocoa powder, preferably Dutch process
2 teaspoons baking soda
1 teaspoon salt
1 cup neutral vegetable oil, such as canola, soybean or vegetable blend
1 cup sour cream
1 1/2 cups water
2 tablespoons distilled white vinegar
1 teaspoon vanilla extract
2 eggs

When the cakes are cool, make the peanut butter frosting.

Here is what you will need:


Step 1: Be sure to sift the sugar--it makes a difference.


Step 2: In a large bowl with an electric mixer, beat the cream cheese and butter until light and fluffy. Gradually add the confectioners’ sugar 1 cup at a time, mixing thoroughly after each addition and scraping down the sides of the bowl often. Continue to beat on medium speed until light and fluffy, 3 to 4 minutes


Step 3: Add the peanut butter and beat until thoroughly blended.


Step 4: Frost the cake with the icing. Place one layer, flat side up, on a cake stand or large serving plate. Spread 2/3 cup cup of the Peanut Butter Frosting evenly over the top. Repeat with the next layer. Place the last layer on top and frost the top and sides of the cake with the remaining frosting. Place the iced cake in the fridge uncovered, so it will be nice and firm before you spread the chocolate ganache over it.


Full List of Ingredients for the Peanut Butter Icing:
10 ounces cream cheese, at room temperature
1 stick (4 ounces) unsalted butter, at room temperature
5 cups confectioners’ sugar, sifted
2/3 cup smooth peanut butter (the real thing--none of this organic/low-sugar stuff)


While the iced cake is cooling, make the chocolate-peanut butter ganache.


Here is what you will need:


Step 1: In the top of d double boiler or in a bowl set over simmering water, combine the chocolate, peanut butter, and corn syrup. Cook, whisking often, until the chocolate is melted and the mixture is smooth.


Step 2: Remove from the heat and whisk in the half-and-half, beating until smooth. Use while still warm.


FINAL STEP!! To decorate with the Chocolate–Peanut Butter Glaze, put the cake plate on a large baking sheet to catch any drips. Simply pour the glaze over the top of the cake, and using an offset spatula, spread it evenly over the top just to the edges so that it runs down the sides of the cake in long drips. Refrigerate, uncovered, for at least 30 minutes to allow the glaze and frosting to set completely. Remove about 1 hour before serving.


Full List of Ingredients for the Chocolate-Peanut Butter Ganache:
8 ounces seimsweet chocolate, coarsely chopped
3 tablespoons smooth peanut butter
2 tablespoons light corn syrup
1/2 cup half-and-half

So the reason this cake is displayed on a random cake plate is because I needed to transport it to my husband's office for his going away party, so I didn't have a chance to cut into it at home and take photos from 20 different angles (I'm lucky my food doesn't seem to be too camera shy). I wanted a picture of the "inside" though, so I snuck off with my camera during the party and took a quick picture of the last man standing. Apologies it is not very artistic, but I didn't want to come off as the crazy wife who takes pictures of her food, so I had to act fast.

Despite the horrible lighting and bad cutting job--you get the idea--3 amazing layers of deliciousness.

Thursday, March 25, 2010

Risotto with Butternut Squash, Gorgonzola, and Toasted Pecans


I have already talked about my love for Oprah, but I can't emphasize enough what a great resource her website is for fabulous guest-worthy recipes. I stumbled upon this recipe a few years ago, and it has been a dinner party go-to ever since. Almost every time I make it, I receive a follow-up email the next day from someone asking for the recipe. People always seem a little hesitant when I start to add the Gorgonzola and pecans, but the tangy crunch compliments the risotto so well. We had a Gorgonzola disaster the last time I made this (and by "disaster", I mean it had gone bad well before the expiration date), and it just wasn't the same--it felt naked. So don't be afraid. Embrace the topping.

A note about preparing the dish: Risotto has always sounded intimidating to me, but it actually isn't very hard at all. It does require a bit of patience, and you can't wander off for more than a minute or two (it needs to be stirred pretty frequently). This recipe can be made with either chicken or vegetable stock. I prefer chicken, but I have made this for vegetarian friends with the vegetable stock, and it still tastes great.


Here is what you will need:


Step 1: Bring the stock to a boil in a small sauce pan and then lower the heat. In a large, heavy-bottomed saucepan over a medium-high flame, heat the olive oil. Add the onion. Sauté for 2 minutes, stirring constantly.


Step 2: Add the rice; stir until well coated, about 1 minute.


Step 3: Add the garlic and squash and continue to stir another 30 seconds.


Step 4: Lower the heat to medium and add 1/2 cup hot stock. With a wooden spoon, stir until the liquid is absorbed but the rice isn't sticking to the pan.


Step 5: Continue adding 1/2 cup stock and stirring until the stock is absorbed, about 20 to 25 minutes, or until the rice is tender.


Step 6: Remove from heat; add the sage, butter, and salt. Season with pepper. Stir to combine. NOTE: The recipe calls for 2 tsp of salt. I think that is WAY too much (maybe because I don't use low-sodium stock usually). Start off with 1 tsp, and if you think it needs more, go for it.


Step 7: Place risotto in a serving bowl and top with Gorgonzola and pecans.


List of Ingredients:
•4 cups low-sodium chicken or vegetable stock
•2 tablespoons extra-virgin olive oil
•1/2 small onion , finely chopped
•1 cup arborio rice
•2 cloves small garlic , finely chopped
•1 medium butternut squash (about 1 1/2 pounds), peeled, seeded, and cut into 1/2-inch cubes
•8 large sage leaves , chopped
•2 tablespoons butter
•2 teaspoons salt
•Freshly ground pepper
•1/3 cup crumbled Gorgonzola
•1/4 cup chopped toasted pecans

Tuesday, March 23, 2010

Maple Delight Dressing


I recently had one of my best friend's from High School over for dinner. She was visiting from out of town, and this was the first time I had ever cooked for her. I wanted to go all out, so even the salad dressing was homemade. She took one bite of it and LOVED it. She asked me what the dressing was called (I got this from a family friend year's ago), and I honestly didn't have a name for it. She decided it should be called "maple delight," and I think that describes it pretty well. The dressing isn't overly sweet though, so don't let the name fool you. The combination of maple with the garlic, olive oil, pepper, etc., makes for a complex combination of flavors that will "delight."


Here is what you will need:


Step 1: Place all of the ingredients (except olive oil) in a blender---mayonnaise, maple syrup, vinegar, Dijon mustard, garlic, salt, and freshly ground pepper.

Look at that yummy maple syrup...


I used a pretty large clove of garlic..


If you do not own a pepper mill, go out and buy one--it makes such a difference!


Step 2: While the other ingredients are mixing, slowly add the olive oil.


Step 3: Prepare the salad. I use baby greens, granny smith apples, dried cherries, pecans, and a little bit of red onion. If I am preparing this for just a few people, I prepare the salad on individual plates for a nice presentation. Otherwise, I just mix it in a large bowl.


Step 4: Slowly add the dressing and enjoy!


Ingredients for the dressing:
1/4 cup mayonnaise (I use fat free)
1/4 cup maple syrup
3 Tbsp champagne vinegar or white vinegar (I prefer champagne)
1 Tbsp Dijon mustard
1 clove garlic, minced
1/2 tsp. salt
1/2 tsp. freshly ground pepper
1/4 cup olive

For the salad:

5 oz.(8cups)baby greens
1-2 Granny Smith apples, peeled,cored, and cut into fine
matchstick strips
1/2 cup dried cherries
1/2 cup walnuts or pecans toasted
1/2 purple or red onion sliced

Tuesday, March 16, 2010

Molten Mocha Cakes


Last week, I wrote about my anniversary dinner. Whenever I am planning a dinner party or, in this case, a special dinner for two, I am always fixated on how to time everything just right so that nothing overcooks or gets too cold while waiting. Before I discuss this decadent dessert, I thought I would share how the timing of this menu worked out.

For my anniversary dinner, I made the lobster salad the night before. The lobster salad actually tastes better when it is allowed to sit overnight. This allows the flavors to really come together and marinate. I also cut the potatoes the night before and placed them in a tightly sealed zip lock bag. The next day, when I got home from work, I prepared the dessert through Step 5 and placed it in the refrigerator. I placed the potatoes in the oven around this time since they take about 35 minutes to cook. The steak only took 15 minutes to prepare, so I saved that for the last moment. As soon as we were ready to start eating, I placed the ramekins with the chocolate cakes in the oven. Those took 11 minutes to cook and needed to cool on a rack for another 10 minutes, so by the time we finished eating, dessert was ready. Keep in mind, we are fast eaters. Normal people probably could have waited to put the dessert in the oven during the second course.

I had never made this dessert before, but for some reason, steak and chocolate desserts are synonymous in my book. Martha Stewart came up with this fabulous dessert. Definitely don't overcook it because the best part is biting into it and watching the chocolate ooze out. To quote my husband, "I feel like we are actually eating in a restaurant." It was that good.

A note about the ingredients: She calls for instant espresso powder, but I couldn't find any. I used instant coffee granules instead, and I thought it still tasted fabulous!

Here is what you will need:


Step 1: Preheat oven to 400 degrees. Butter two 6-ounce ramekins, then dust with sugar. Place butter and chocolate in a microwave-safe bowl. Microwave on high in 20-second increments, stirring after each, until melted. Let cool slightly.


It will be nice and smooth like this...


Step 2: Meanwhile, in a small bowl, whisk together egg, egg yolk, sugar, espresso powder, and salt.


The mixture will have a mocha color to it...


Step 3: Add chocolate mixture; whisk to combine.


Step 4: Add flour, and whisk just until combined (do not overmix).


Step 5: Pour batter into prepared ramekins. (Recipe can be made ahead up to this point. I made this about 2 hours before dinner and then placed it in the refrigerator at the start of dinner)


Step 6: Bake until a toothpick inserted 1/2 inch from edge of ramekins comes out clean, and a toothpick inserted in center comes out wet, 10 to 12 minutes (do not overbake). Cool 10 minutes on a wire rack. Run a knife around inside of ramekins to loosen. Invert cakes onto serving plates. Dust with sugar; serve immediately.


List of Ingredients for 2 cakes:
2 tablespoons unsalted butter, plus more for ramekins
1/3 cup confectioners' sugar, plus more for ramekins and serving
2 ounces semisweet chocolate, broken into pieces
1 large egg
1 large egg yolk
1 teaspoon espresso powder (I used instant coffee powder)
Pinch salt
3 tablespoons all-purpose flour

Monday, March 15, 2010

St. Patrick's Day Cupcakes


Happy (almost) St. Patrick's Day! I was at Sur La Table looking for green decorations and found a cute green glitter pen and some green glitter sprinkles, so I decided to use them to decorate St. Patrick's Day cupcakes. I saw that Bakerella (dessert goddess)used a red velvet recipe and replaced the red dye with green to create green cupcakes. Easy enough right?

(awkward silence)

Umm....that did not work for me. I used my own recipe for red velvet cupcakes and just tried changing the dye. Well, apparently, I needed a lot more green dye because I used an entire bottle of green gel dye, and my cupcakes STILL sort of looked more like mud.

Here is what happened:

They started off like this...


But then once I added the cocoa/flour mixture, they turned into a horrible green mud color, and I was completely out of dye at that point.


Although, they kind of looked like chocolate when cooked...either way, it was not the look I was going for.


So anyway, my recommendation is to find a basic white cupcake recipe(or box mix) and plan to use a lot of green dye. At least, it still tasted delicious. More importantly, the cream cheese icing was amazing, so it was only a semi-failure. I am not going to bother showing how to make mud cupcake batter, but I will show you how I made the cream cheese icing.

Here is what you will need:


Step 1: Beat butter and cream cheese until fluffy, 3-4 minutes.


Step 2: Add sugar, 1 cup at a time, and then vanilla; mix until smooth.


Now time to decorate!

Step 1: Frost the cupcakes.


Step 2: Using the gel pen, create the outline of the shamrock (three hearts attached at the stem).


Step 3: Fill in the outline.


Enjoy!


Full list of ingredients:
Green glitter gel pen (edible, of course)
Green sprinkles
2 sticks of unsalted butter (room temperature)
12 ounces of cream cheese (room temperature)
4 cups/1 lb. powdered sugar
3/4 tsp. vanilla